Thursday, 6 May 2010

Conclusion

Now I have finished the assignment I feel I have learned a lot in this part of the module. I had no prior experience of animating in the a 3D enviroment before the start of the semester and therefore I feel I have come a long way during this module. I think the overall result of the animation is better than I expected it would be when I was first given the assignment brief.

I think the animation is good but there is a lot that could be improved with the animation part particularly. There are many scenes where at some point the animation does not look natural of flow particularly well and could be tweaked to get a better result. I think this is due to my time management of the project as I focused for too long on the modelling part rather than the animation. I think I probably set myself too bigger task for the amount I time I had to complete the assignment. Having to model a whole theatre was too time consuming and there were many other fables I could have chosen with less to model, meaning I could focus on the animation more.

I believe I have used a wide variety of animation techniques and tried to incorporate as many as I could into the animation. I achieved most of what I would have like to have done, however the animation would have been better if the reactor water had worked and I wanted to try lip syncing, but did not have time to.

I feel that since I started this assignment I have learned at lot and would have liked to improve upon the parts I did first that are not so good. I am also happy with my use of cameras and lighting in the animation. I think all of the are used to a good effect and none are without purpose. It is the first time I have thought about lighting and cameras and so overall I feel I did a good job.

In conclusion I feel I have learned a lot over the course of the module and the experience I gained will be very valuable when it comes to future modules. I think the animation meets the criteria for the assignment well and I hope my hard work will be overall worthwhile.

Using Premiere Pro

To create the finished .avi I used Adobe CS4 Premiere Pro to put together all the rendered animation sequences. I rendered the whole thing in 1024 x 768 resolution as it looked nicer than 800 x 600 on my computers. Once the scenes were rendered they were imported into Premiere Pro. Sound effects were then added to improve the animation. Some parts of the animation were slowed down as they real time animation was too fast. Credit slides were then added for the introduction and end and to place subtitles over where the fox is talking. Finally the animation was rendered into 1 .avi file. The quality of the movie is not as good as the rendered versions from 3DS , but I could not find a way to improve it.

Scene 2 - Fox in the theatre

Finally the foxes body and head were animated in order to make the fox look like its taking part in the scene. The fox was originally static but making it look around the theatre while the shot is happening makes it have a purpose in the scene.


A camera was then added around the stage area to show the seating. A tween was then added by using the set key function to pan around that area of the theatre, showing the fox clearly above the stairs.


The theatre was the move so the animation would be the same but the fox would be walking along the stage. I learn from animating scene 1 that it is tricky to get the fox to change direction using the motion mixer, so I thought splitting the scene up would be a much better and simpler approach.


A camera was then added to show this part of the scene. It was set up in the upper tier of the theatre looking down on the stage area. This was done really just to show another angle of the theatre.


The door was then animated using the set key button at the point where the fox walks through it.


This scene was originally going to be a chase scene between the security guard and the fox. I decided to change this because the scene would not show any different types/methods of animation and I felt the time could be better spent on another scene. The scene was split into 3 sections. The first would pan a camera around the theatre. The second would show the fox walking along the red carpet and the third would show the fox walking along the stage to the backstage area. Using the motion mixer the fox was animated to walk along the red carpet area.

Scene 7 - Sleeping Fox

The omni light in the room was animation to move away from the room to fade the light, which would fade out into the end sequence in the finished animation. A camera was added into the room to set the view of the fox sleeping.


This scene was very short and simple to create. The room from scene 4 was used. The fox was then manipulated into the laying down position. The auto key button was used to make the foxes head lie down as though he went to sleep.

Scene 4 - The Mask

Finally a couple of camera were added to the scene. The first would pick up the fox walking into the room. The shot was designed to be above the fox's legs so the lack of a walk sequence was not scene. Instead the fox's head and spine move up and down to give the impression he is walking. The second camera captures the animation after the fox see the mask.


The mask was animated to fall in the water. I planned to use reactor in this scene for the water however this was not possible as every time I tried to preview or create the animation 3DS would freeze. To compensate I added some key frames that would show the mask bobbing up and down in the water.


I then started working on the animation in the scene. Using the auto key function the biped of the fox was manipulated into different positions to give the impression the fox saw the mask that made him jump. Finally the fox's mouth is tweened so it looks like he is talking.


Lighting was added to the room. Firstly an omni light to illuminate the room, then a target spot light that is focused on the mask.


Before animation could be added, the scene needed to be created. I decided to set this scene in a backstage storage room. I created the basic room shape using a box with a normal modifier attached to reverse the polygons. I Added a few chairs and pipes from the previous scenes. I created a few boxes also and textured them with an image of a box. Finally the mask was created and given a turbo smooth modifier. A plane that would act as a sheet covering a chair would make the mask look more like a person in the eyes of the fox.

Tuesday, 4 May 2010

Scene 5 - Fox Hunting

A couple of cameras were added. The first will capture the security guard walking down the stairs. The second will capture the security guard searching the front of the theatre.


The doors in the scene were then animation using the set key tool. The guards arm was positioned so it looks like he is pushing the doors open.


The torch object was added once again to the security guard left hand. A target spot light was connected to the torch to make it look like the torch is on. At first the light target did not follow the light object but this was solved also by linking the light target to the torch object. I think this adds a really nice effect to the scene with a good dynamic lighting effect in addition to the lightning effect.


The next part of the scene shows the security guard looking for the fox inside the theatre. The footstep tool was used plot the guard's path through the theatre. When it came to the stairs the animation doesn't look as natural as it could, but there is no easy way to solve this so rather than wasting time fixing this I decided to place the camera in a way the animation might look more natural.


The first part of the animation was the security guard picking up the torch. To do this the auto key was used to gradually move the security guard hand into position to pick up the torch. To pick it up a dummy box was created that was linked to the torch. A link constraint was then added to the torch in the motion panel. A link was then added to the dummy object and left hand from frame 60 onwards. Therefore when the animation reached frame 60 the torch would be connected to the biped but not before, giving the impression the torch was being picked up.

Monday, 3 May 2010

Scene 6 - Scared Security

The amount of frames was reduced from 1000 to 400 as this scene is much quicker than scene 3. The lighting needed to be tweaked slightly in order to see what was happening. The spot light above the guards head was given a higher intentsity. A camera was then added that films over the guard shoulder. I made it static unlike scene 3 as the animation happens so fast that a viewers eyes could not adjust fast enough to see the animation if the camera was zooming in and zooming out.


I then once again used the footstep tool to add a walk sequence to the security guard up to a point in the corridor until he sees the guard. At the point a run sequence was added using the footstep tool so the security guard would run back out of the corridor scared. I used the auto key keyframe tool to add a flailing arm effect to show his distress.


This scene was relatively simple to create. I first made a copy of scene 3, which takes place in the same location. All I then had to do was import the security guard model.

Sunday, 2 May 2010

Scene 3 - Fox in Corridor

Finally a camera was added that would follow the fox down the corridor until the ghost appeared. The foxes back left leg with the mesh problem was purposely left out of shot so the deformation was not seen and it just looks like the fox is crouching down to avoid being seen.


Some object were added to the scene to make it look more interesting. A chair from the theatre was imported into the scene using the merge function. A high specular and gloss was applied to the poles to reflect the light, making it look more realistic. The rest of the fox's walk sequence was added. To create a pause effect I created another .bip file were the biped was not animated. This caused a strange problem whereby the foxes leg would cause the mesh to collapse and look strange. No solutions was found to correct this at this time. The amount of frames was increased once again to 1000 in order to accomodate all the animation.


The ghost in the scene was not as visible as intended. The feet could be clearly seen however the body could not. To make it clearer a target spot light was added and the intensity was massively reduced to make it look like a shadow.


A dummy security guard was made that would be in shadow and appear at the end of the corridor. Using the footsteps tool the security guard was made to walk across the end of the corridor. A spray patch was created to give the impression the room has a leak. The rain count was reduced to one and the size was increased so it was clearly visible.


The rooms box was converted to an editable poly, so textures could be applied to each individual polygon. A wood texture was added to the floor then the theatre stars materia lwas added to the walls and ceiling. Finally the lighting of the room was changed. An omni light was added at the far end to illuminate the fox and the end of the room. A target spot light was also added to illuminate the top of the fox so its head was not in the shadow.


To start this scene I needed to build the room. I created a box and used the normal modifier to reverse the polygons. I then added a few walk sequences to the fox using the motion mixer to get an idea how the scene would look. The amount of frames in the scene was then changed from 500 to 800.

Saturday, 1 May 2010

Scene 1 - Storm

Finally a couple of cameras were added to the seen. The first was outside the theatre to show the fox walking along the street. a positioning tween was added to make the camera pan slightly to show a close up of the fox entering the theatre. The second camera is a static camera in the foyer to show the security guard being alerted to the foxes presents.


The next step was the make the security guard patrol the foyer corridor. This was easy to do thanks to the footstep tool in the motion box. Numerous footsteps were added and then the head was rotated slightly to show the door shutting alerted the security guard.


After a lot of search Internet forums I came up with the idea of attaching a dummy box to the bipeds COM. Adding a key frame that would rotate the box meant the model would also rotate. It does not look perfect as the animation speeds do not perfectly match however it was the only solution. So the box did not show up on the rendering I unchecked the rendering properties in the object properties box.


One of the biggest problems I faced so far was how to make the fox walk forward but turn a corner at the same time. I initially thought that I may be able to use the path constraint tool of the bipeds COM part. This did not work and ended frustratingly in error messages.


After I created the foxes walk along the street. To do this the motion mixer was used to import and .bip file of a walk animation I created for the fox. Adding a transition track meant the .bip could be looped over and over.


To create a realistic looking walk for the fox I created a .bip file. Planted keys were used to anchor the foxes feet to the ground when they needed to be in the walk sequence. The keys were then set free when the legs moved.


The first animation added to the seen was rain and lightning. A problem was found that was if the other models were too big the rain would only fall within a small area. I tried adding multiple spray objects but the result was not satisfactory. To resolve this I scaled down the theatre. This was simply created using the spray tool. Adjustments were made to the particle size and rain count to create a realistic looking shower of rain.


Before the animation could be applied I needed to import the models from the files into the one with the theatre. This caused massive problems that took quite a while to resolve. The big problem was that the firstly trying to export the models in different file formats meant that some were not able to find textures or import the biped correctly, as well as being different sizes.. I tried both .3ds and .obj extensions with no luck. The solution was to merge selected parts of the other .max file, however when coming to the security guard model it would not import properly. The mesh was completely jumbled up. This meant i had to merge the mesh and re do the biped for this model. The fox model imported with biped successfully.

Bipedding The Models

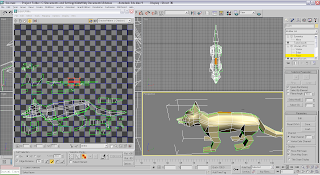
The second problem was when the feet moved, it impacted on the opposite foot. This was because the bone weighting was not correct. This was completely new to me but was eventually worked out and solved. By reducing the weight in certain places it meant the biped moved the mesh more naturally. I also had to increase the size of the bones in the leg in order to make the model walk more naturally. It is still not perfect but a great deal better than it was.


After the fox was completed the security guard was given his skeleton. The biped bones were easier to create that the fox as the model is human shaped. Again a skin modifier was applied to connect the bones with the mesh. Using the footstep tool a few footsteps were made to see if the model was able to move how it should. I noticed that firstly the eyes and hat were not following the mesh. This was because there were not connected to the biped. This was easily solved by using the link tool.


The first model that was bipedded was the fox. Using the biped tool a human shaped biped was created and rotated 90 degrees so it could be transformed into an animal shape. Once the biped and its bones were shaped and placed accordingly a skin modifier was applied to the fox and the bones added. Luckily enough no bone weighting needed to be changed.

Thursday, 29 April 2010

Fox Model Development

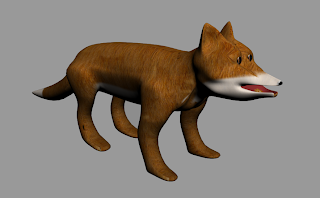
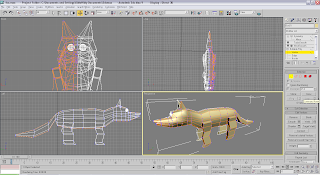
Render of finished fox.


Used a bitmap to texture the eyes on. Then added the UVW map to create the body textures.


Applied an unwrap UVW modifier for the texturing of the fox.


Finished model.


Slightly modified the body proportions in the legs and mouth.


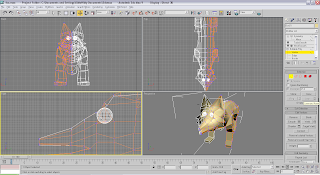
Added detail to the head to make it look more like a fox.


Added in a turbo smooth modifier to smooth over the model.


Worked on the shape of the legs and tail.


Added on a tail.


Extruded polygons once again to create the legs.


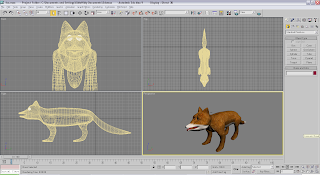
Extruded and sliced the polygons to create the rough body shape.


Added in a couple of spheres for eyes, then changed the shape of the ears and mouth.


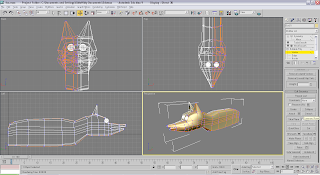
Carried on manipulating the vertices into a more fox like shape while using the quick slice tool to add in more vertices.


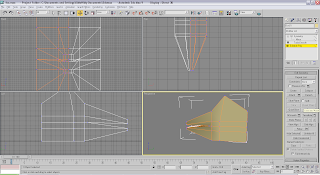
Started by creating a box and converting it to an editable poly. Manipulated a few vertices into a very basic shape of the head, then added symmetry modifier to mirror the other side of the fox.